
Black Myth Wukong: Chapter 1 walkthrough
Here's a complete guide to Chapter 1, including how to unlock the Ancient Guanyin Temple
 Image credit: Rock Paper Shotgun/Game Science
 Guide
by
Jeremy Blum
Guides Writer Published on Sept. 10, 2024 Follow Black Myth: Wukong
Guide
by
Jeremy Blum
Guides Writer Published on Sept. 10, 2024 Follow Black Myth: Wukong
Looking for a Black Myth: Wukong Chapter 1 walkthrough? Chapter 1 of Black Myth: Wukong serves as an excellent introduction to the game's mechanics, giving players the chance to master fundamental staff skills as they take the Destined One through the Forest of Wolves towards the lair of Black Bear Guai.
While it's one of the smaller chapters in the game, Chapter 1 is still chock full of twists and turns, including one location - the Ancient Guanyin Temple - that is only accessible after ringing three hidden Bells. In this guide, we'll present a full rundown of everything you need to do to complete Chapter 1 of Black Myth: Wukong, including how to unlock the Ancient Guanyin Temple and unearth all of the secret bosses nearby.
Black Myth: Wukong Chapter 1 walkthrough
Chapter 1 of Black Myth: Wukong is entitled Black Cloud, Red Fire. It is preceded by a brief prologue, which we've included here for the sake of completion, and divided into the following four areas - click on each name to be taken to the section of the walkthrough where that area begins. You should also check out our guide to all bosses in Chapter 1 for greater details on fighting the foes in your path.
0. Prologue walkthrough
Black Myth: Wukong kicks off with a prologue that's about fifteen minutes long and features an epic confrontation between Sun Wukong in his prime and the gods of the Celestial Court. You'll be given control of Wukong as he fights Erlang Shan, and since you have no health bar, there's no way you can fail this confrontation. As you get your grips on the game's moveset, it's worth taking note of Wukong's special moves, like A Pluck of Many and Cloud Step, as these are the same techniques that your Destined One will use later in the game. And don't worry, you'll be able to confront Erlang for a round 2 eventually. (See our Chapter 6 boss guide if you're curious...)
1. Forest of Wolves walkthrough
Forest of Wolves: Front Hills
The proper start of Black Myth: Wukong begins as the Destined One appears from the form of a peach in the middle of the Forest of Wolves. Smack the Wolf Guais in front of you and go up the steps. At the fork in the road, go left to fight a Wolf Scout guarding a chest. To your right is a Wolf Stalwart; defeat him and you'll be able to unlock the "Front Hills" Keeper's Shrine.
From the Shrine, move forward and tackle the wolves in your path. Cross the bridge and keep moving to reach the Bullguard. If you'd rather explore the river, follow it for a brief ways to face a Crow Diviner, who'll be slightly tougher than the wolves you've faced thus far.
 Black Myth: Wukong's very first boss, Bullguard, is just an excuse to get the Immobilize spell. |
Image credit: Rock Paper Shotgun/Game Science
Black Myth: Wukong's very first boss, Bullguard, is just an excuse to get the Immobilize spell. |
Image credit: Rock Paper Shotgun/Game Science
Fighting the Bullguard is a tutorial on how to dodge and freeze enemies more than anything else. Once you've won and gotten the Immobilize spell, go past the gate and head left at the fork in the road to make it to the first Meditation Spot of the game, The Arbor. After resting there and unlocking a Spark, go through the nearby cave to reach the next Shrine.
Forest of Wolves: Outside the Forest
After interacting with the "Outside the Forest" Shrine, you'll be temporarily turned into a cicada and encouraged to explore the nearby area, which is large and contains a fair number of secrets. You'll probably notice Wandering Wight, the large-headed Yaoguai muddling about across the bridge not far from the Shrine. Wandering Wight is the first boss to serve up a sizable challenge, and you can return back to defeat him at any time prior to defeating Elder Jinchi, the secret boss of Chapter 1. However, if you're itching to put everything you've learned about dodging thus far to the test, go ahead and take him on immediately - just be prepared to roll past his shockwaves!
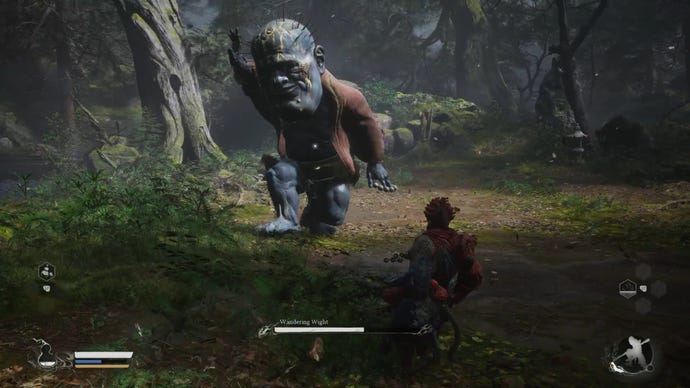 Wandering Wight is here to give you your first dose of dying and trying again and again. It's worth practising your skills on him, trust us. |
Image credit: Rock Paper Shotgun/Game Science
Wandering Wight is here to give you your first dose of dying and trying again and again. It's worth practising your skills on him, trust us. |
Image credit: Rock Paper Shotgun/Game Science
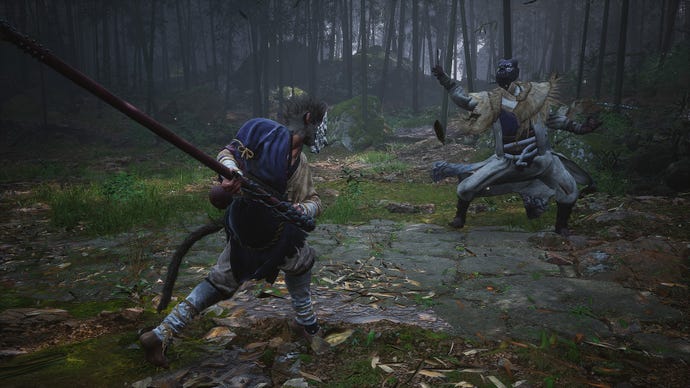
After defeating Wandering Wight, you'll free his Spirit, which is one of the best in the game. Examining it will give you the message "Cannot absorb Spirits without guidance," but don't worry - you'll be able to get this awesome Spirit soon enough. In the meantime, explore the area across the bridge and opposite Wandering Wight to encounter Guangzhi, a wolf Guai with a flaming double-edged polearm.
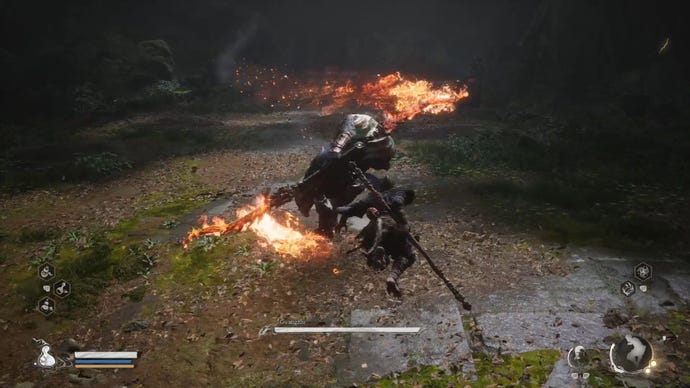 Like most of these early fights, Guangzhi is a great way to perfect your dodge skills before tougher bosses later down the line. |
Image credit: Rock Paper Shotgun/Game Science
Like most of these early fights, Guangzhi is a great way to perfect your dodge skills before tougher bosses later down the line. |
Image credit: Rock Paper Shotgun/Game Science
Guangzhi is very fast, so stay aggressive, dodge his charge, and stop him in his tracks with well-timed usages of Immobilize. When he's down, you'll unlock the Red Tides Transformation, which lets you transform into Guangzhi and unleash heavy damage. This is one of the most useful early skills in Black Myth: Wukong, so be sure to use it generously.
Before leaving Guangzhi's arena, be sure to ring the Bell attached to a small shrine, which is necessary to unlock Chapter 1's hidden area. Then retrace your steps. If you go back to where you found Wandering Wight and follow the path through a tunnel and across wooden platforms, you'll end up at the "Guanyin Temple" Shrine.
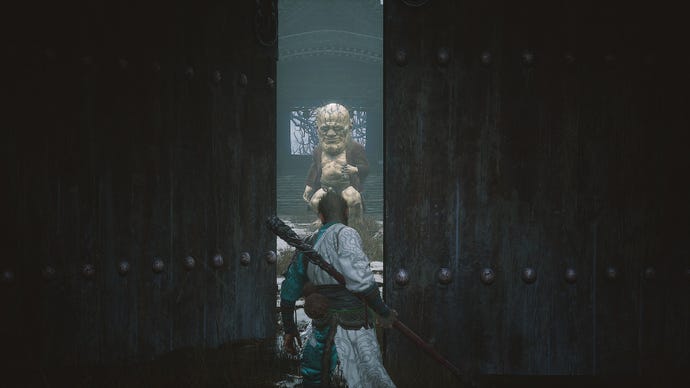
As an aside, you may have noticed a giant waterfall in this area marked by a Buddha statue. This is a secret pathway to the boss Red Loong, first of the hidden dragon bosses scattered throughout the first four chapters of Black Myth: Wukong. In order to open up the waterfall, you need the Loong Scale, a secret item from Chapter 2. Our Chapter 1 boss guide on Red Loong has the details on acquiring the scale, but once you've got it later in the game, return here and interact with the waterfall to start the fight. Beware of Red Loong's lightning strikes, and target the vessels on his back when he stumbles in order to deal big damage.
 If this is your first run through Chapter 1, you won't be able to fight this guy until you're well into Chapter 2. His difficulty is on par with Chapter 2's bosses, so it's for the best. |
Image credit: Rock Paper Shotgun/Game Science
If this is your first run through Chapter 1, you won't be able to fight this guy until you're well into Chapter 2. His difficulty is on par with Chapter 2's bosses, so it's for the best. |
Image credit: Rock Paper Shotgun/Game Science
Forest of Wolves: Guanyin Temple
After saving at the "Guanyin Temple" Shrine, enter the temple complex and loot it of all items. As you proceed deeper, a giant wolf will lunge from the rooftops and challenge you. This is Lingxuzi, the first Yaoguai King in the game. Fearsome he might appear, but Lingxuzi is a prime target for your new Red Tides transformation, and he isn't as hard as he looks as long as you avoid his bite and two-part swipe combo.
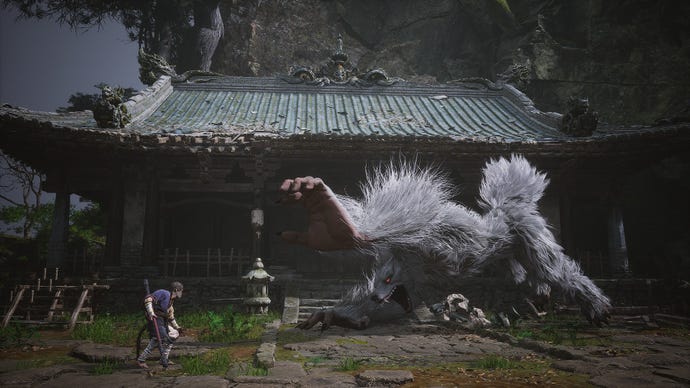 Lingxuzi featured in the first gameplay footage of Black Myth: Wukong back in 2020, and amazed viewers with his fluffy fur, which doesn't appear to have been downgraded in the final game. |
Image credit: Rock Paper Shotgun/Game Science
Lingxuzi featured in the first gameplay footage of Black Myth: Wukong back in 2020, and amazed viewers with his fluffy fur, which doesn't appear to have been downgraded in the final game. |
Image credit: Rock Paper Shotgun/Game Science
After roasting Lingxuzi, be sure to search the temple for a Celestial Jade Lotus Pill, and then leave via the rear exit to clear the Forest of Wolves and reach the "Back Hills" Shrine.
2. Bamboo Grove walkthrough
Bamboo Grove: Back Hills
From the "Back Hills" Shrine, veer left to find a cave with The Cavern Meditation Spot inside. The horse Guai Ma Tianba will also be here. You'll need to find Ma in five of the game's six chapters in order to unlock his Transformation, so talk with him and get to know the guy now.
Following this, exit the cave and follow the path. You can jump into the water below to grab some Will, but in order to advance you want to go up the stairs and cross the bridge to reach the proper start of the Bamboo Grove. Be sure to open the gazebo chest along the way to get yourself a whole bunch of medicines.
Bamboo Grove: Snake Trail
Right by the "Snake Trail" Shrine is a Crow Diviner who you'll need to take out. After saving and resting, climb the stairs and you'll see a small alcove with an old man reciting to himself. This is Yuan Shoucheng, a sage from the Journey to the West novel who will teach you how to cultivate spirits like Pokémon. After talking with him, go back to the "Snake Trail" Shrine and choose Retrieve Spirits to get access to the Wandering Wight Spirit, as long as you defeated the big-headed boss a ways back.
With your Spirits in tow, you're ready for the tougher Yaoguai in this area. Cross the nearby bridge and follow the path until you get to a wooden sloped platform. Jump off this platform to the right and head into the large part of the river to find Baw-Li-Guhh-Lang, the first of Black Myth: Wukong's optional frog bosses. Baw-Li-Guhh-Lang's not too hard, but his long tongue lashes have mighty range and there are a few other Croaky enemies in the area who may interrupt the fight.
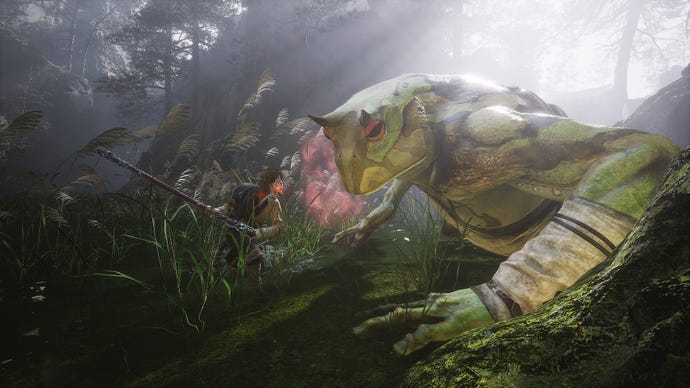 You'll face many frog Yaoguai Chiefs in your quest, and this big fella is the first. |
Image credit: Rock Paper Shotgun/Game Science
You'll face many frog Yaoguai Chiefs in your quest, and this big fella is the first. |
Image credit: Rock Paper Shotgun/Game Science
Following this fight, retrace your steps to the main path and proceed forward until you enter a bamboo clearing. Beware, as this place is full of wandering Snake Patrollers and Skeletal Snakes who will rise up to ambush you if you get close. Go to the north of the clearing and enter the pathway marked by torches to start a fight with Guangmou, an old colleague of Guangzhi's.
 Dig into the Journal entries to learn of the shared history between Guangmou and Guangzhi, and their relationship with Elder Jinchi. |
Image credit: Rock Paper Shotgun/Game Science
Dig into the Journal entries to learn of the shared history between Guangmou and Guangzhi, and their relationship with Elder Jinchi. |
Image credit: Rock Paper Shotgun/Game Science
Guangmou uses ranged attacks and poison sprays to knock down your health, so be ready to dodge. For some fun dialogue, activate Red Tides during the fight. After he's dead, be sure to ring the Bell located up the small set of stairs in Guangmou's arena. Then exit via the other archway to make it to the "Marsh of the White Mist" Shrine.
Bamboo Grove: Marsh of the White Mist
You can grab a Luojia Fragrant Vine near the Shrine, and as you follow the platforms downwards, you'll see a Snake Patroller attacking Shen Monkey, the first of the game's NPC shopkeepers. Help him out and he'll guide you into a cave and offer to upgrade your Gourds and Drinks. Once you've gotten a boost, leave and continue following the platforms to emerge upon a watery area. Whiteclad Noble awaits you at the end of this lake.
 Whiteclad Noble will probably serve as a bit of a wall in your progress of Chapter 1, but don't give up! |
Image credit: Rock Paper Shotgun/Game Science
Whiteclad Noble will probably serve as a bit of a wall in your progress of Chapter 1, but don't give up! |
Image credit: Rock Paper Shotgun/Game Science
Whiteclad Noble tends to give new players quite a struggle, due to his serpentine moves, hard-hitting attacks, and vicious second form. Be wary of his reach and rely on fully charged Pillar Stance heavy attacks; you can also repeat the reliable combo of Immobilizing him, smashing him with Wandering Wight, and then following this up with Red Tides to pile on the damage before he can hurt you.
After the fight, you'll get some ominous dialogue about all of the Bells in Chapter 1. Go to the left side of the lake to find a pathway that leads to the final Bell. Ring the Bell and you'll be transported to the Ancient Guanyin Temple.
3. Ancient Guanyin Temple walkthrough
This eerie temple is home to Elder Jinchi, who shares an ominous connection with Wandering Wight and plays an important role in the chapter's main story. Fighting Elder Jinchi is very much like the battle with Wandering Wight, though at certain points in the combat Jinchi will float into the air and start siphoning off the life force of nearby corpses. When this happens, attack the corpses as fast as you can to prevent them from restoring Jinchi's health.
 Elder Jinchi is the tragic hidden boss of Chapter 1. For the sake of poetic justice, use Wandering Wight against him. |
Image credit: Rock Paper Shotgun/Game Science
Elder Jinchi is the tragic hidden boss of Chapter 1. For the sake of poetic justice, use Wandering Wight against him. |
Image credit: Rock Paper Shotgun/Game Science
Once Jinchi is gone, you'll be transported back to the Bell by the Whiteclad Noble arena and you'll have the Fireproof Mantle Vessel, which will help immeasurably in the upcoming fight against the final boss of Chapter 1.
3. Black Wind Cave walkthrough
Black Wind Cave: Cave Interior
Exit the Whiteclad Noble arena via the cave entrance that the noble was guarding. A fork in the road will greet you; the left path holds a Celestial Taiyi Pill and the last Meditation Spot of Chapter 1, The Cliff. The right path leads to the "Cave Interior" Shrine.
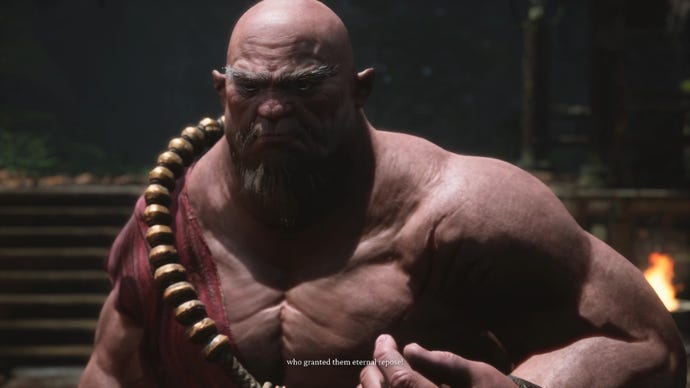 Black Wind King is a big dude, but don't be fooled into thinking he's slow - his invincible wind gust transformation is fast and will destroy you if you aren't cautious. |
Image credit: Rock Paper Shotgun/Game Science
Black Wind King is a big dude, but don't be fooled into thinking he's slow - his invincible wind gust transformation is fast and will destroy you if you aren't cautious. |
Image credit: Rock Paper Shotgun/Game Science
Go forward from the Shine and you'll meet Black Wind King, the humanoid form of Black Bear Guai. Probably the hardest foe you've faced thus far, Black Wind King has a tricky ability where he turns into an invincible wind gust and charges at you. The timing to dodge these wind blasts is tough to nail down, but you'd best become familiar with it now, as the upcoming final boss uses the same tactic. Once you've beaten Black Wind King, you'll get Cloud Step, a very handy spell that lets you transform into mist, dodge enemy blows, and launch a surprise counterattack.
Black Wind Cave: Outside the Cave
The "Outside the Cave" Shrine lies beyond the Black Wind King boss area. From here, you've got to trek to the pinnacle of the mountain, fighting foes all along the way. This is a long climb, and the most annoying enemies in your path are bound to be the Wolf Archers who harass you from afar. Don't be afraid to use your new Cloud Step spell when you need a breather from all the action.
The final Shrine of Chapter 1, "Bodhi Peak", awaits you at the end of your ascent.
Black Wind Cave: Bodhi Peak
Fire's everywhere, and Black Bear Guai is here to take you on. He's a tough customer who delivers huge strikes from his big bear paws, though you should have some idea of what to expect after the last time you tangoed.
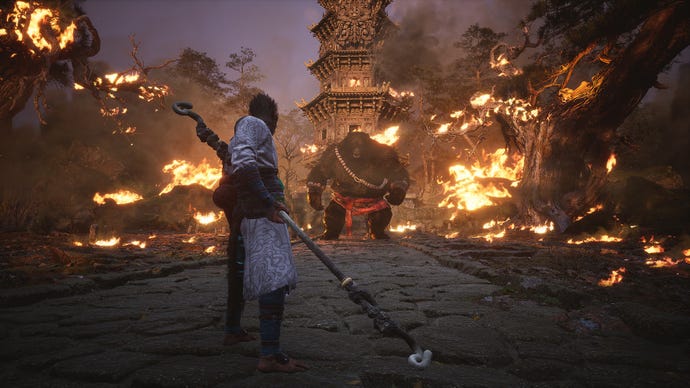 All your training in Chapter 1 has led to this fight! Use the Fireproof Mantle Vessel and beware the flames erupting from the ground. |
Image credit: Rock Paper Shotgun/Game Science
All your training in Chapter 1 has led to this fight! Use the Fireproof Mantle Vessel and beware the flames erupting from the ground. |
Image credit: Rock Paper Shotgun/Game Science
Fighting Black Bear Guai is much easier if you have the Fireproof Mantle Vessel. Activate it right when he slams the ground and starts spamming flames all across the arena. He'll then turn into a gust of fiery wind and throw himself at you; dodge like crazy once this happens and retaliate as soon as he goes back into bear form.
Congratulations on completing Chapter 1 of Black Myth: Wukong - the denizens of the Forest of Wolves will be speaking your name for a long time to come! For a more detailed look at all of the Yaoguai in every chapter of this expansive game, take a deep dive into our guide to all bosses in Black Myth: Wukong. If you'd prefer a quick rundown of places to level up and rest, check out our guides to all Keeper's Shrine locations and all Meditation Spots. And last but certainly not least is our guide to all Journal entries, which will help you make sense of Black Myth: Wukong's awesome take on Chinese legend.


