All Star Wars Outlaws Experts: Locations and abilities
Here are all Expert locations needed to learn new skills in Star Wars Outlaws
 Image credit: Rock Paper Shotgun/Ubisoft
 Guide
by
Kiera Mills
Guides Writer Updated on Sept. 5, 2024 Follow Star Wars Outlaws
Guide
by
Kiera Mills
Guides Writer Updated on Sept. 5, 2024 Follow Star Wars Outlaws
Looking for all Star Wars Outlaws Expert locations? There are a total of 9 Experts in Star Wars Outlaws who are special individuals that can teach Kay Vess new skills or improve existing ones like 'Slicing' (hacking into terminals) using blasters, upgrading the Speeder and more.
To locate these Experts (accessible via the 'Abilities' tab in the main menu), you'll need to pick up hints and gather intel from various sources. If you're eager to upgrade Kay's skills as quickly as possible we have listed all the Star Wars Outlaws Expert locations below, plus a full rundown of how to recruit them and all their skill abilities.
All Star Wars Outlaws Expert locations and abilities
There are a total of 9 Experts in Star Wars Outlaws. Here are all Expert names, locations and the skills they offer once unlocked. We also have a walkthrough on how to find each expert below in a rough recommended order.
| Expert | Location | Skills |
|---|---|---|
| The Bartender | Canto Bight |
|
| The Mechanic | Toshara |
|
| The Slicer | Toshara |
|
| The Mercenary | Kijimi |
|
| The Gunslinger | Tatooine |
|
| The Hotfixer | Tatooine |
|
| The Scavenger | Akiva |
|
| The High Roller | Akiva |
|
| The Veteran | Akiva |
|
The Bartender location
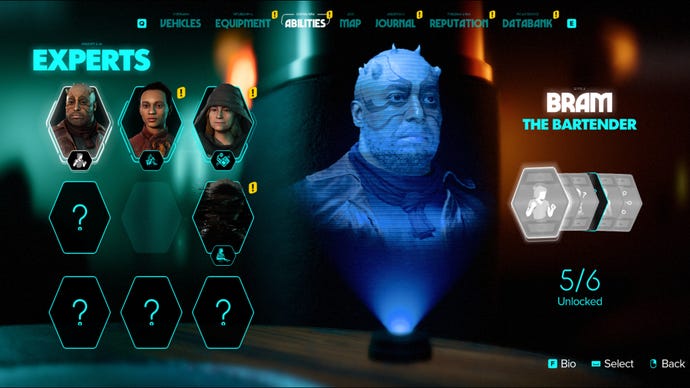 You'll get access to the 'Bartender' Expert first in Star Wars Outlaws. |
Image credit: Rock Paper Shotgun/Ubisoft
Starting with an easy one, you'll meet 'The Bartender' almost straight away when beginning Star Wars Outlaws. The Bartender is Bram, owner of the local bar in Canto Bight, Cantonica.
Bram specialises in melee skills. I recommend unlocking these as soon as possible in your playthrough. In particular, the 'Fast-Talk' skill can allow you to distract enemies for a short period of time when caught sneaking, earning you a chance to act before alarms are sounded. The 'I Know Someone' skill is also a great one to keep an eye on, and you can unlock it pretty quickly once you discover the world of Toshara.
This skill allows you to fulfil personal requests for merchants, earning you more credits and building your reputation as you go.
The Mechanic location
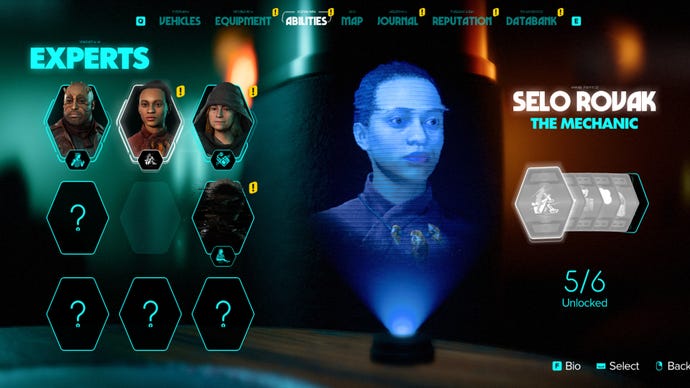 Speeder upgrades will vastly improve your on-world traversal experience. |
Image credit: Rock Paper Shotgun/Ubisoft
The Mechanic specialises in Speeder upgrades. To find out their location, you must follow these steps:
- Progress through the main story until you finish the 'Underworld' and 'New Tricks' quests. This will take you to Jaunta's Hope, where Danka will reveal that there is both a 'mechanic' and 'slicer' expert on Toshara.
- Speak to the bartender at Jaunta's Hope. They will reveal that someone who knows The Mechanic (named Selo) is located in a windfishing settlement called Kadua.
- Travel to Kadua at the far west of Mirogana Valley, outside of Mirogana city.
- Speak to the two mechanics in the area and they will direct you to a cliff northeast of Jaunta's Hope where Selo has set up shop.
- Once you reach Selo she will give you the coordinates for a wind farm west of the Boulder Forest. Travel there to steal the component she needs to upgrade the Speeder.
How to get the Speeder component
- Once you've reached the coordinates, place the magnetic disruptors on the terminal outside and run into the vent.
- Follow the passage around until you get to a large drop, the trick here is to use your Speeder to make the jump down (you can call your Speeder to you with the Y key on PC).
- Once you enter the industrial chamber with twin fans, send Nix to press the button beyond the barrier, which will then lower it.
- Travel through the vent into another fan room. Run past the fans on the walkway when they temporarily stop.
- Drop down a level, then use the stun setting on your Blaster to shoot the power node in front of you.
- Climb across the yellow fan grates and piping on the wall until you're at the next walkway.
- Climb up the yellow pipe to the right, then make your way towards the fan - timing it so you don't get hit when it turns on.
- Jump down two consecutive pipe holes, then squeeze through the opening.
- Wait until the walls recede then walk across the walkway to the next set of fans.
- Shoot two more power nodes then grapple across to the next section.
- Make your way across more piping and watch out for more bursting walls.
- You'll need to climb up the pipes beyond this walkway and then use these protruding walls as platforms to hop across.
- Once done, make your way up to the next vent.
- Extract the accelerator from the main computer, then grapple your way out to the large fans which are now immobile.
- Return to Selo, she will upgrade your Speeder with a speed boost and you'll be able to unlock more skills from her via the 'Abilities' menu.
The Slicer location
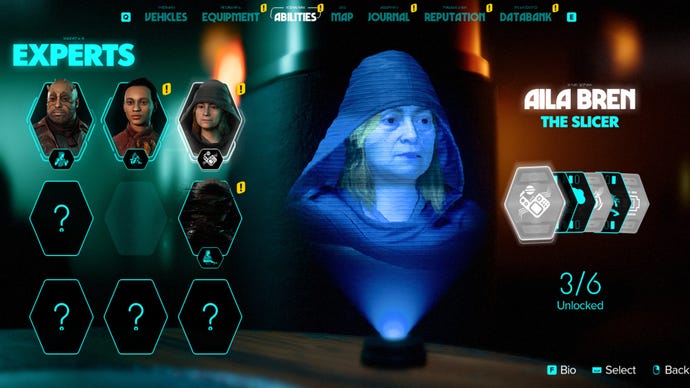 Completing the quest to recruit Aila will get you a new and improved
Slicing Kit.
Image credit: Rock Paper Shotgun/Ubisoft
As with The Mechanic above, to start the quest to find The Slicer you must first make decent progress through the main questline. Once you complete the 'Underworld' and 'New Tricks' quests and gather the smugger's cache for Danka near Jaunta's Hope, she will tell you about the two Experts. To find the location of The Slicer you must follow these steps:
- Travel to the map marker indicated by Danka, inside Makal's Gambling Parlor in Mirogana.
- The two people who have the intel are by one of the exits, lean on the bar to overhear their conversation.
- This will give you the name of The Slicer - Aila Bren - and her contact's location on the landing bay in the Crimson Dawn district of Mirogana.
- You'll be able to enter the district freely if you have a good reputation with the syndicate. Pass through the beaded archway guarded by two soldiers via the kitchen to the north of the market district in Mirogana.
- Otherwise, you'll have to sneak in via the vent located around the corner, in the red steamy maintenance room (this will take you to the kitchen storeroom).
- Inside the district you'll need to make your way to the landing pad to speak to the contact. This area is restricted so you'll need to sneak to the centre but once there, you should be able to speak to him without alerting the guards.
- Upon speaking to him and Aila, she will give you coordinates and ask you to bring her an Imperial Code Sequencer.
- Travel to the coordinates within the northwest of the Southern Falls region on Toshara. Be careful if you're wanted as it is within Galactic Empire boundaries.
- The Code Sequencer is on a technician. You'll need to steal it from them using Nix. The person you're looking for is in a grey uniform and can be tagged using the binoculars feature.
- Once you have it, travel to Aila's coordinates. She will be located within the same region but further to the southeast.
- Make your way to the parking garage within the compound - there is a route via the nearby cliff to the right of the main entrance which will take you over the top of the compound.
- Once inside, speak to Aila and exit via the vent to her left, install the sequencer onto the turret on the roof.
- Make your way to the main tower, taking advantage of the now distracted Stormtroopers.
- Within the tower, access the main computer then escape the compound.
- Meet Aila's contact at Makal's back at Mirogana.
Now you'll be able to unlock more of The Slicer's skills such as smoke bombs, quieter running when sneaking, sneak shots and more. You'll also be able to hack or 'slice' with devices without terminals now.
The Mercenary location
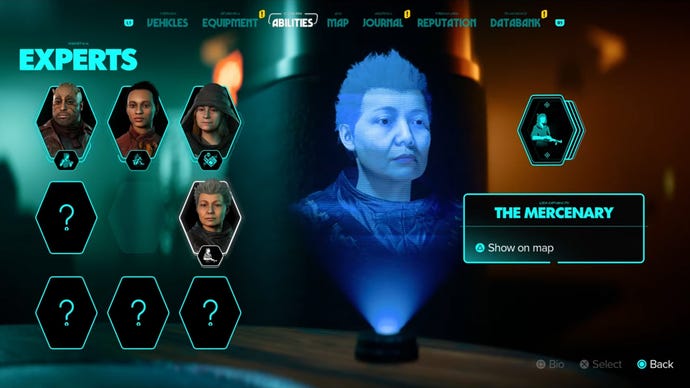 It's worth recruiting The Mercenary for the 'Loop Maneuver' skill that allows better movement with the Trailblazer in space. |
Image credit: Rock Paper Shotgun/Ubisoft
To find 'The Mercenary' you need to complete 'The Wreck' main quest and thus unlock Hyperspace travel. Then, travel to Kijimi and follow these steps:
- Travel northwest from the Kijimi Spaceport to the Domak Refectory bar.
- Speak to the bartender here, who will direct you to someone called 'Rooster' who is an Expert in big guns.
- Speak to Rooster, who is sitting at a table opposite the jukebox. It seems the Empire blew up her ship and she had to drop her guns.
- Now, head back to the Trailblazer and set a route for outside the Kijimi Orbit.
- Travel south within the asteroid field to Pilot's End.
- As you advance, head towards the centre of the asteroid belt and interact with the floating yellow crate.
- The beacon within will signal that the weapons are on the move and are somewhere on Tatooine.
- Use the Hyperdrive to travel to Tatooine.
- Once landed, travel to the map marker in the South Jundland Wastes to meet Rooster.
- Speak to Rooster who plans on blowing up the convoy transporting her guns.
- Pick up the Z-6 Rotary Cannon and shoot anywhere in the distance.
- Shoot the Stormtroopers on the convoy.
- Defeat the reinforcements.
- Speak to Rooster to complete the quest.
The Gunslinger location
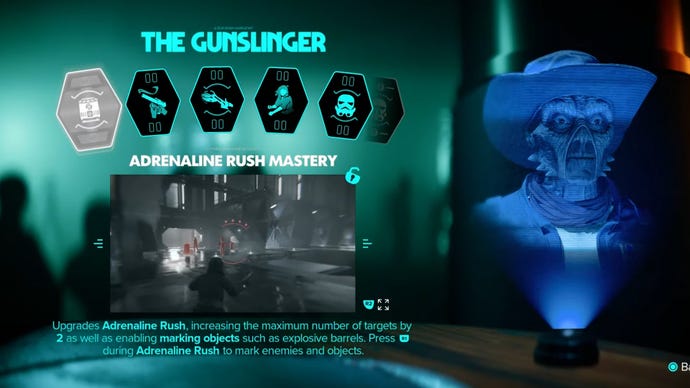 Consider The Gunslinger if you want to improve your Adrenaline ability. |
Image credit: Rock Paper Shotgun/Ubisoft
The Gunslinger quest becomes available after you complete 'The Heavy' main questline on Tatooine. After this, ND-5 will inform Kay that the bartender in the Mos Eisley Cantina may have intel. From the bar, follow these steps:
- Speak to the bartender, who directs you to Shepp who is standing near the band in the same room.
- Shepp informs you that the fastest gunslinger in Mos Eisley may be a pirate that used to run with the Hutt Cartel, she directs you to them (in the southern hills) for more information.
- Travel to the map marker in the Hutt Cartel Storehouse (northwest of Wayfar).
- Once you're at the base, pick up the datapad in the southern building. The datapad will be inside, to the right of the doorway.
- It transpires that the gunslinger you're after is Quint, the sheriff from Wayfar.
- Traver to Wayfar and speak to Quint. She will be in the cells to the east.
- Do some target practice with Quint.
- Follow Quint to the barricades.
- Defend Wayfar by shooting the Hutts.
- Run to the Water Station and shoot the incoming enemies there.
- Once they're all gone speak to Quint.
- Go into adrenaline mode, mark Urda and his gang, then shoot to complete the quest.
The Hotfixer location
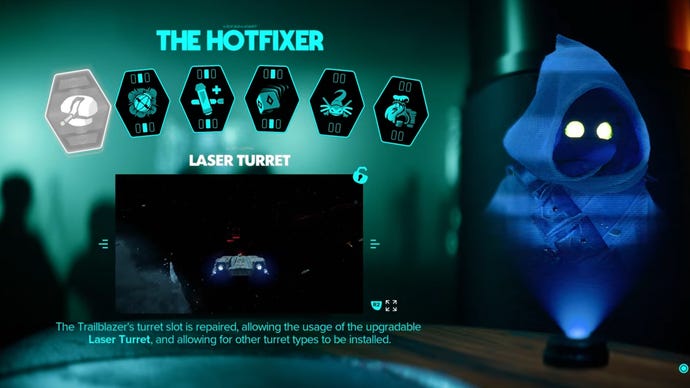 if you enjoy Sabacc, The Hotfixer's 'Magnetic Dice' skill is worth picking up for a new cheating mechanic. |
Image credit: Rock Paper Shotgun/Ubisoft
The Hotfixer quest also starts in Tatooine. You'll need to complete the 'Partners' and 'Jabba's Favour' main quests to unlock the intel for this quest from ND-5. Once you have completed these, follow these steps to unlock The Hotfixer Expert:
- Travel to the quest marker in Mos Eisley (Scavenger's Draw).
- Speak to one of the workers in the area, who will direct you to the Jawas. No one else will risk the job with the Empire's presence on Tatooine.
- Travel to the map marker located within the Bestine Junkyard west of the Desert Valley.
- Speak to the green-robed Technician working on the vehicle. She'll direct you to the last location where the Jawa's caravan was spotted.
- Travel to this marker, located in the South Jundland Wastes.
- Once you're at the map marker, follow the higher path and continue upwards on the Speeder. The Jawa Sandcrawler will be above.
- Speak to the Jawa working on the droid. She will agree to install the turret if you give her a Sarlaac Tooth.
- Travel to the Sarlaac Pit map marker in the Western Dune Sea.
- At the map marker, head towards the cluster of rocks where the pirates are waiting.
- Defeat the pirates and enter the pit, which is also the Sarlaac's mouth.
- Shimmy through the crack in the wall next to the crate.
- Continue along the path and over the grapple point.
- As you near a dead end, use your blaster (ion mode) to shoot the rocks out of the way.
- Drop down below and pick up the tooth from the metal scrap.
- Climb up the yellow-pained ledges to the southwest.
- Scale up the ledges and work your way around, jumping where necessary.
- Continue west, then up more walls.
- Grapple across to the next ledge, then walk across the skiff.
- Exit the cave through the shimmy hole.
- Chase after the thief on your Speeder.
- Ignore other hostiles in the area and use your Speeder boost. The thief will lead you to a compound.
- Continue forward, enter the compound and pick up the tooth from the thief's Speeder.
- Head back to the Jawas and give them the tooth to complete the quest.
The Scavenger location
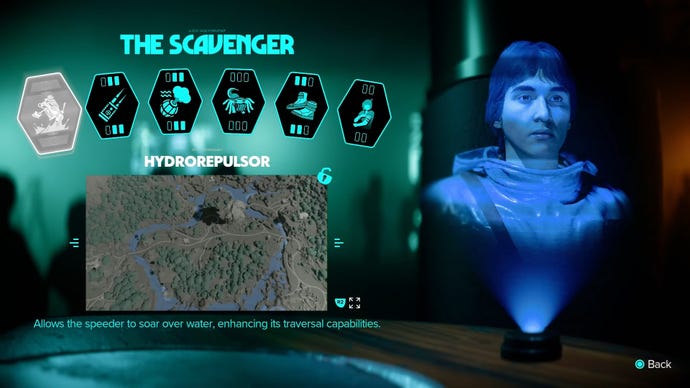 You'll need to recruit The Scavenger to continue with the main quest on Akiva. |
Image credit: Rock Paper Shotgun/Ubisoft
To get the intel needed to start The Scavenger quest, you'll first need to complete 'The Droidsmith' main questline on Akiva. After which, Kay will be pointed in the direction of Temmin. You'll need to recruit Temmin to unlock the ability to use the Speeder across the water and continue the main questline. As such, follow these steps:
- Head over to the Map marker in Sashin Village, east of the Karaba Foothills.
- In the centre of town, eavesdrop on the two women by the large baskets.
- Speak to them to get Temmin's Workshop location.
- Head to the new map marker west of Mount Selasa.
- Defeat the enemies outside.
- Speak to Temmin. He will inform you that to make the hydro repulsor upgrade permanent, he will need some Durasteel Struts. He will also inform you that you can get some from a nearby ship.
- Travel to the next map marker, using your kitted-out Speeder to make the journey across the lake.
- Once you've travelled downstream you'll see a raised platform. Drive across it with your Speeder and you'll land in the central body of the lake.
- From here, travel southwest to the next island that has a Speeder ramp. Use it and the next one to get across to the island you're looking for.
- This will lead you to a restricted area where Surat's shuttle is.
- Get off your Speeder and make your way down and inside the little island (head towards the lights and the noise of people chatting).
- Sneak or fight your way past the thugs and enter the shimmy spot ahead.
- As the shuttle prepares for takeoff call your Speeder to you and follow it from land.
- Follow along the lake, then take the main road, ignoring the gangs as you go.
- Once you pass through a cave ahead, you'll be instructed to stay off the water and ND-5 will mark on your map where the shuttle is headed.
- Travel to the map marker, this will lead you to a landing pad in Pyke territory.
- Sneak past the Pykes and approach the shuttle.
- Once there, loot the crate in front of it for the Durasteel Struts.
- Return to Temmin at the Myrra Spaceport to complete the quest.
The High Roller location
 Now, here's a familiar face. |
Image credit: Rock Paper Shotgun/Ubisoft
As the name would suggest, the High Roller quest involves a high-stakes opponent at the Sabacc Parlor in Myrra, Akiva. To get the location of the parlor and recruit the High Roller Expert on Akiva, follow these steps:
- Travel to The Alcazar bar in Myrra City.
- Right of the main doorway, by the tables on the raised platform, are two people. Eavesdrop on their conversation to reveal more about the parlor's location.
- Head back outside and continue toward the new map marker (Satrap's Promenade).
- Walk inside the bar with red lights outside.
- Go through the door near the jukebox.
- Head downstairs and either try bribing or using your contacts to get past the bouncer.
- Once inside, watch the cutscene.
- Head back to the Trailblazer and set a course for Kijimi.
- At Kijimi, head towards the Crimson Dawn card table in their district. You will have to sneak into the district if you have a 'poor' reputation with the gang, but regardless of your reputation, you won't be hassled once you're inside the cardroom.
- Win the Sabacc game to get Lando's Token back for him.
- Return to the Trailblazer and travel to Akiva's orbit.
- Shoot or outfly the Imperial troops.
- Land on Akiva.
- Meet Lando at the quest marker (southeast of the Karaba Foothills).
- Speak to the associate.
- Help defeat the Imperials.
- Speak to Lando to complete the quest.
The Veteran location
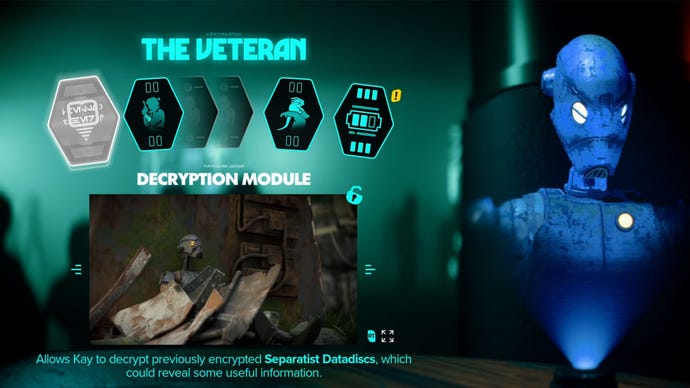
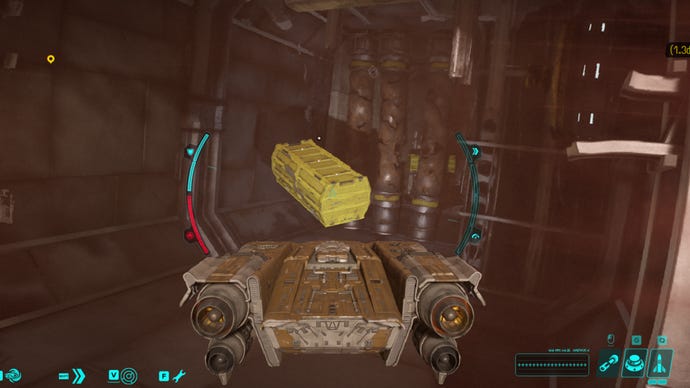 Not all yellow crates contain CIS Transmissions, some contain other loot. As a rule, always pick up any crates you see in space. |
Image credit: Rock Paper Shotgun/Ubisoft
To recruit 'The Veteran' combat droid MT-7, you'll need to first collect encrypted clone war data discs (called CIS Transmissions) from the various yellow crates in space. You may have seen these yellow crates drifting in different orbits. There are many to collect, but acquiring at least five of them will unlock the next part of this quest. ND-5 will give you coordinates for a transmission signal on Akiva. After that, follow these steps to recruit The Veteran:
- Travel to the landing bay called the 'Abandoned Hideout' on Akiva.
- Head down the base, then on top of one of the old crates. There will be a hole in the wall to the west that you need to head towards. Use the various yellow pipes to help you.
- Once through the hole, use the stun mode on your blaster to shoot the nodule by the door.
- Looking out of the hole, shoot the second power node (attached via the yellow striped power line).
- Go through the door and pick up the datapad beyond.
- Go to the next map marker in Myrra Valley, slightly south of where you currently are.
- Once at the map marker, go through the cave.
- Continue forward and up a yellow climbing rock to the east.
- Folow the ledge around and pick up the datapad from the deactivated droid.
- Exit the cave and continue to the next map marker, south within the Karaba Foothills.
- At the marker spot, go inside the cave mouth and climb up the yellow cliff walls.
- Once above, use the grapple point to get to the next yellow wall.
- Pick up the next datapad on an outstretched droid arm.
- Grapple and work your way down.
- Head back to the Trailblazer and launch it into orbit.
- Fly to the next marker in Trapper's Field towards the orange glowing CIS Satellite.
- Search for five jammers nearby and destroy them with the Trailblazer's guns. The jammers look identical to the CIS Satellite.
- Defeat the pirates.
- Return to the Abandoned Hideout bay on Akiva.
- Speak to MT-7 to complete the quest.
That rounds up our guide on all Expert locations in Star Wars Outlaws. For more Star Wars Outlaws tips and tricks, check out our guide to the best Trailblazer upgrades and give your ship a fighting chance when exploring the galaxy. If you're strapped for cash, be sure to also check out our guide to making Credits fast.
