
All Black Myth: Wukong Chapter 5 bosses and where to find them
Track down all 18 boss locations in Chapter 5 of Black Myth: Wukong
 Image credit: Rock Paper Shotgun/Game Science
 Guide
by
Ollie Toms
Guides Editor Published on Sept. 3, 2024 Follow Black Myth: Wukong
Guide
by
Ollie Toms
Guides Editor Published on Sept. 3, 2024 Follow Black Myth: Wukong
Looking for all 18 bosses in Chapter 5 of Black Myth: Wukong? Chapter 5 is generally more linear than the previous couple of regions in Black Myth: Wukong, but it still has plenty of secrets and hidden boss encounters. It's all too easy to miss out on bosses like the Mother Of Flamlings, the Flint Vanguard, the Bishui Golden-Eyed Beast... At least, without the help of a guide like ours.
In this guide we'll walk you through exactly where to find all 18 bosses in Chapter 5, starting at the very beginning with the Pale-Axe Stalwart, and working our way through every secret area and encounter in order until you reach the final boss of the Chapter (and beyond!).
Skip to a different Chapter here!
- Chapter 1 bosses
- Chapter 2 bosses
- Chapter 3 bosses
- Chapter 4 bosses
- More coming soon!
All Chapter 5 bosses in Black Myth: Wukong
Just like the previous Chapter, there's a grand total of 18 bosses to find in Chapter 5 of Black Myth: Wukong. The vast majority of them are Yaoguai Chiefs, including the various Carts which you must track down in order to access the Chapter's secret area, Bishui Cave. You can tackle Bishui Cave before or after the Chapter's final boss, although the final boss is definitely the hardest in the Chapter so you may wish to leave him until last!
Here's the full list of all Chapter 5 boss locations in Black Myth: Wukong:
| No. | Boss Name | Type | Location |
|---|---|---|---|
| 1 | Pale-Axe Stalwart | Character | Woods Of Ember / Ashen Pass I |
| 2 | Brown-Iron Cart | Yaoguai Chief | Woods Of Ember / Ashen Pass I |
| 3 | Father Of Stones | Yaoguai Chief | Woods Of Ember / Height Of Ember |
| 4 | Gray-Bronze Cart | Yaoguai Chief | Woods Of Ember / Height Of Ember |
| 5 | Fast As Wind + Quick As Fire | Yaoguai Chief | Woods Of Ember / Height Of Ember |
| 6 | Flint Chief | Yaoguai Chief | Furnace Valley / Valley Entrance |
| 7 | Cloudy Mist + Misty Cloud | Yaoguai Chief | Furnace Valley / Valley Entrance |
| 8 | Keeper Of Flaming Mountains / Yin-Yang Fish | Yaoguai King | Furnace Valley / The Emerald Hall |
| 9 | Crimson-Silver Cart | Yaoguai Chief | Furnace Valley / The Emerald Hall |
| 10 | Nine-Capped Lingzhi Guai | Yaoguai Chief | Field Of Fire / Ashen Pass III |
| 11 | Flint Vanguard | Yaoguai Chief | Field Of Fire / Ashen Pass III |
| 12 | Mother Of Flamlings (secret boss) | Yaoguai Chief | Field Of Fire / Ashen Pass III |
| 13 | Rusty-Gold Cart (secret boss) | Yaoguai Chief | Field Of Fire / Cooling Slope |
| 14 | Baw-Lang-Lang (secret boss) | Yaoguai Chief | Field Of Fire / Cooling Slope |
| 15 | Top Takes Bottom + Bottom Takes Top (secret boss) | Yaoguai Chief | Secret: Bishui Cave / Purge Pit |
| 16 | Bishui Golden-Eyed Beast (secret boss) | Yaoguai King | Secret: Bishui Cave / Corridor Of Fire And Ice |
| 17 | Red Boy | Yaoguai King | Field Of Fire / Fallen Furnace Crater |
| 18 | Yaksha King | Yaoguai King | Field Of Fire / Fallen Furnace Crater |
Below, we'll explore the exact location of all 18 bosses in Chapter 5, so you can find each of them without any issues during your Black Myth playthrough.
1. Pale-Axe Stalwart
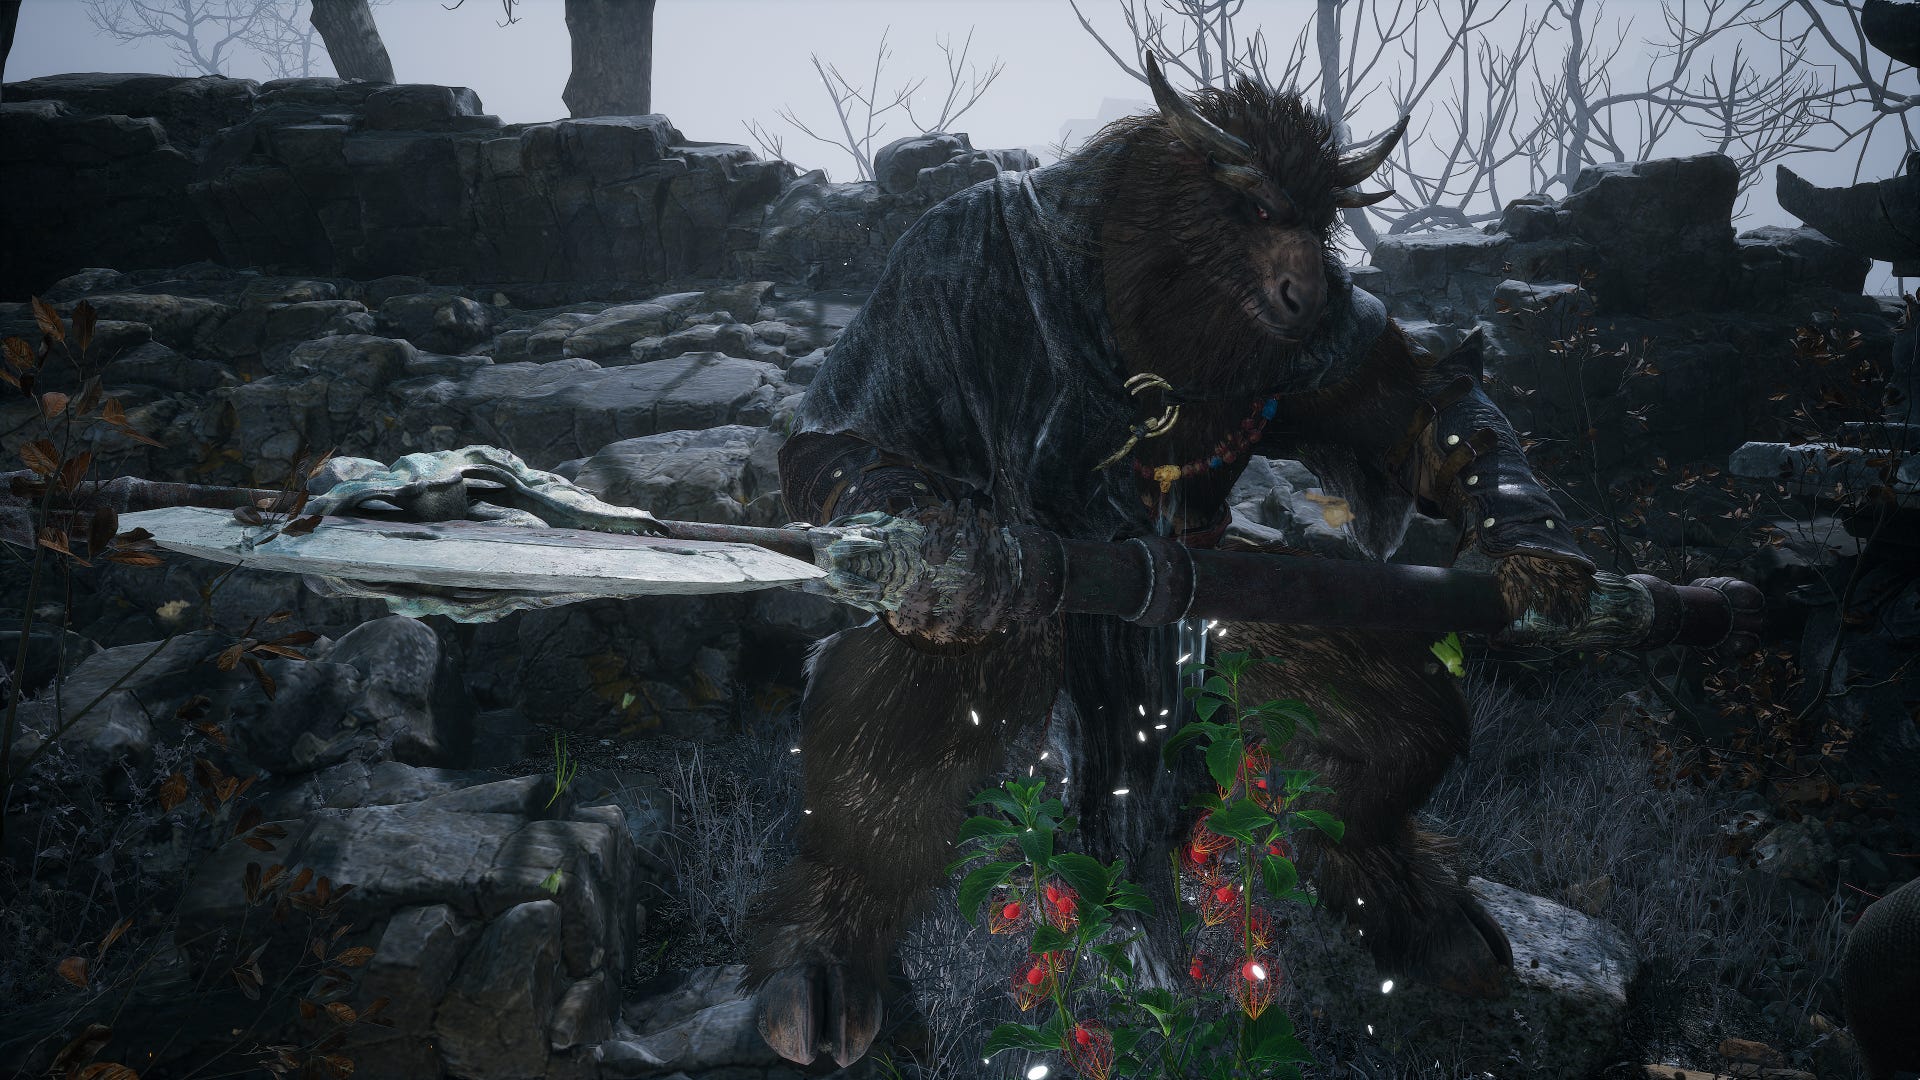 Image credit: Rock Paper Shotgun/Game Science
The first boss you'll encounter in Chapter 5 is the Pale-Axe Stalwart. This unmissable hunk can be found along the story path very shortly after the first Keeper's Shrine: "Ashen Pass I". Just take a right turn after the Shrine and follow the path to arrive at a large fight between Bull Soldiers and Revenants. The biggest among them is the Pale-Axe Stalwart, who mistakes you for another Revenant - hence the fight.
You should watch out for the Cart on the hill raining fire down upon you during this fight (see the next section), but otherwise this is a simple fight as long as you take out the other enemies first, allowing you to overwhelm the Stalwart one-on-one. He doesn't have much in the way of fighting tactics beyond swinging his big poleaxe around. Use Rock Solid to punish his massive wind-up attacks, and you'll be past him soon enough. Well, not really, because he stops the fight before you can kill him, and thereafter becomes an ally for the rest of Chapter 5.
Be sure to speak to the Pale-Axe Stalwart before you move on! He'll tell you about the Cart enemies you're soon to face.
2. Brown-Iron Cart
 Image credit: Rock Paper Shotgun/Game Science
The Brown-Iron Cart is the first (and least) of the Cart bosses strewn throughout Chapter 5 of Black Myth: Wukong. It can be found just up the hill from where you fought the Pale-Axe Stalwart, a few steps before the "Camp Of Seasons" Shrine.
The Brown-Iron Cart is a bit of an annoying enemy, given its tendency to spew powerfully damaging flames in front of itself. The arena is narrow, but work your way to its side and start hammering its wheels, dodging whenever it uses one of its slam attacks. It can't easily be staggered, but you can just repeat this process until it goes down without much hassle.
3. Father Of Stones
 Image credit: Rock Paper Shotgun/Game Science
The Father Of Stones is a big unfriendly guai that attacks you just a few steps on from the "Height Of Ember" Shrine. To get there, you need to battle your way up the various steps and across the various bridges beyond the "Camp Of Seasons" Shrine, but it's a pretty linear path so you should find your way easily.
Aside from his double-barrelled shout, which is rather annoying, this fight is another very straightforward one. He obviously hits quite hard, but he's so slow and his attacks are very simplistic, making them easy to dodge. His Spirit can be absorbed at the end of the fight, giving you that double-barrelled shout for yourself.
4. Gray-Bronze Cart
 Image credit: Rock Paper Shotgun/Game Science
The Gray-Bronze Cart is next up, and if you thought the previous Cart fight took place in a narrow space, you've got another thing coming. Again, it's impossible to miss - just head through the doors next to the Father Of Stones boss fight, and follow the path through the cave. Just beyond the cave is the narrow pathway where you'll find the Gray-Bronze Cart.
The Gray-Bronze Cart loves to spew fire down this pathway to hinder your approach, so you need to dodge out of the way into one of the various little cubby holes to the sides whenever that happens. Once you're close, it has the same attack patterns as the Brown-Iron Cart - which is to say, nothing beyond a flame spew and a two-handed ground slam. Soak up damage with your Transformation if need be, but the real aim is to deal as much damage as possible as quickly as possible before ducking back into the nearest cubby hole to avoid flame damage.
F-F-F-Fire!
If it's not yet clear, many of the enemies in Chapter 5 deal tonnes of Scorch damage, so you should make use of Celestial Pills and Armor to buff your Scorch Resistance, ideally along with the Fireproof Mantle Vessel you got back in Chapter 1.
5. Fast As Wind and Quick As Fire
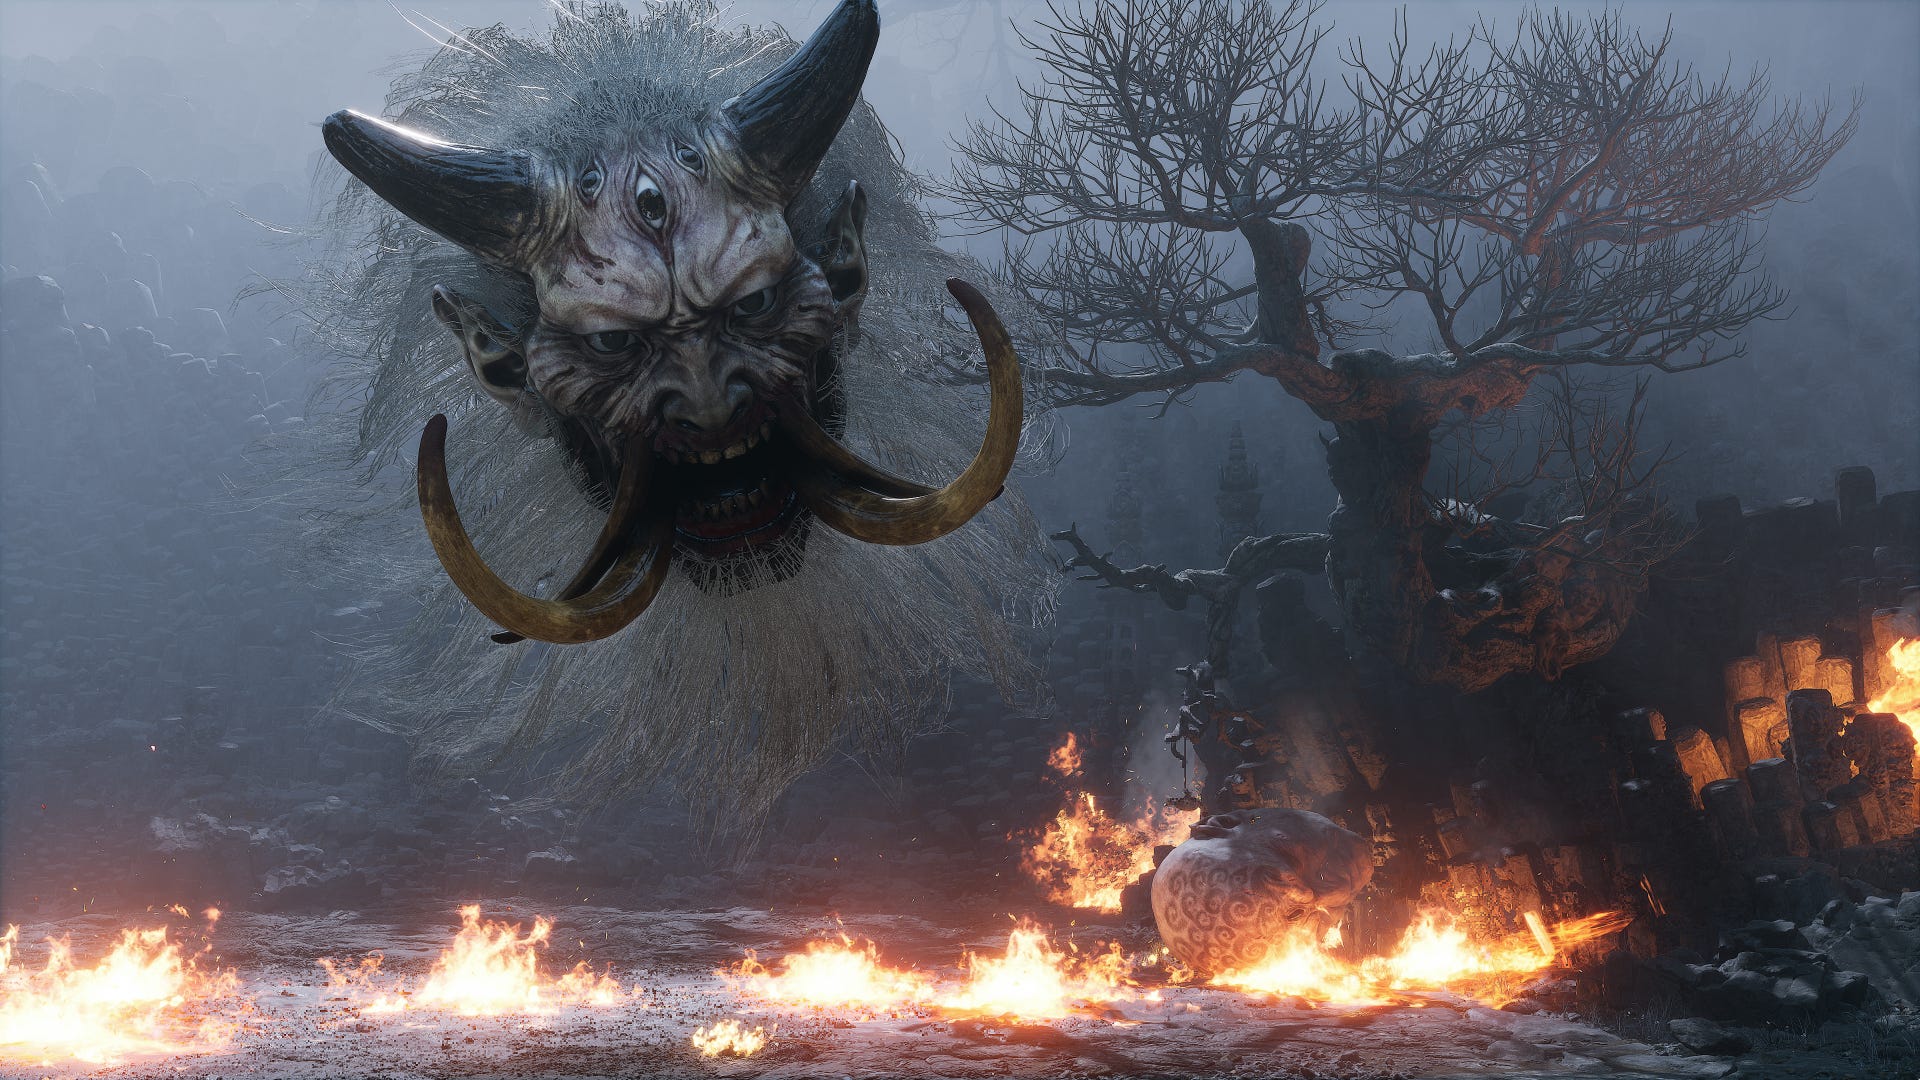 Image credit: Rock Paper Shotgun/Game Science
Oh look, more fire! Fast As Wind and Quick As Fire form a boss duo which you can find immediately after the Gray-Bronze Cart fight. The issue here, then, is that most players won't realise this, and head straight into combat before returning to the nearest Shrine to heal up after the Cart boss. Then again, I forged ahead and still beat the boss duo first try, so you may be fine regardless.
Lots of dodging is necessary here. The only hard part is keeping track of both enemies at once; one is a floating head that breathes tornadoes and other wind attacks at you, while the other rolls around on the floor, charging at you and leaving a fire trail in its wake. Separately, both are easy to damage, stagger, and dodge. Together, they're a bit annoying, but as long as you keep both are in your sights at all times (make use of Immobilize if you need to!) and focus one boss at a time, they shouldn't strain your skills too much.
6. Flint Chief
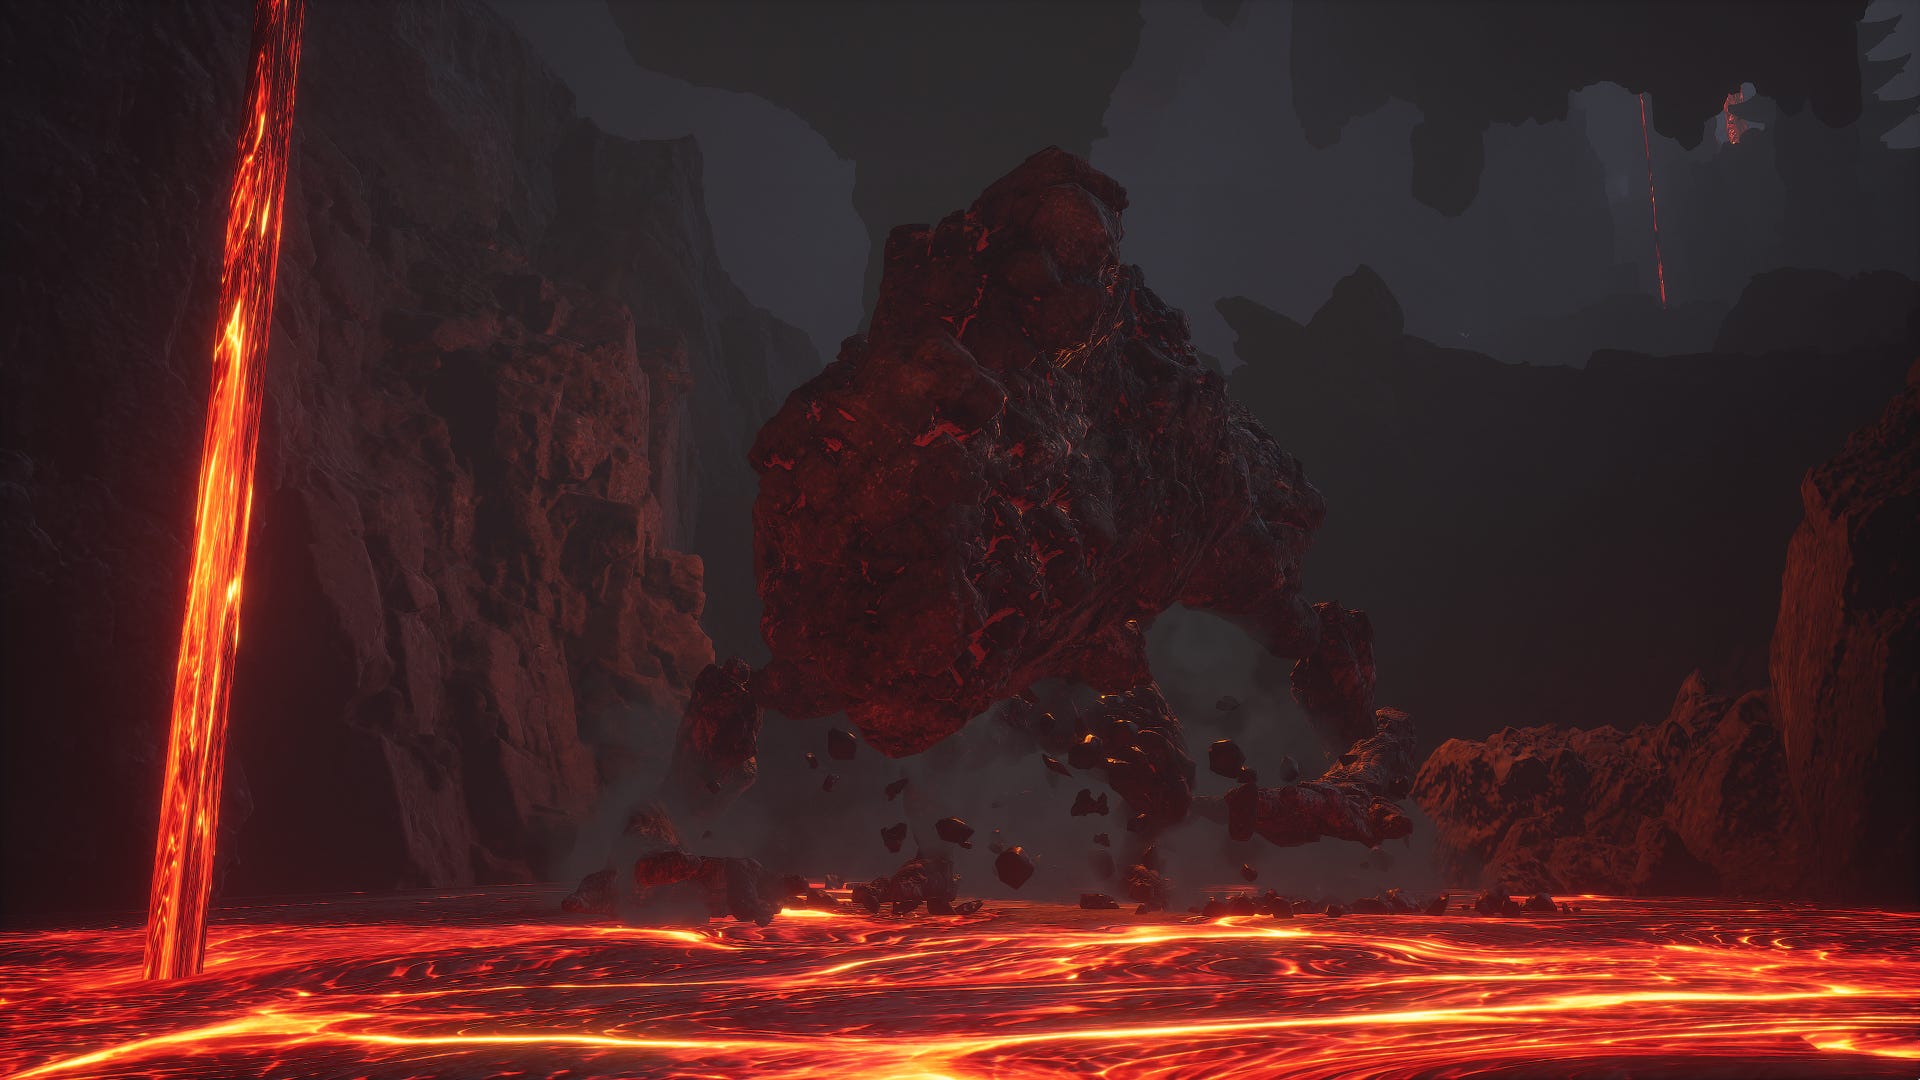 Image credit: Rock Paper Shotgun/Game Science
The Flint Chief is the first easily missed boss in Chapter 5. It's located near the "Valley Entrance" Shrine, which you can reach by following Pingping (the fox) along the main path and down the massive drop. Once you hit the "Valley Entrance" Shrine, head all the way down the slope. Just before you hit the large archway, head left into the lava (equip the Fireproof Mantle Vessel so you don't take damage!), and then turn right. The Flint Chief will form itself out of rocks as you approach.
Due to the Flint Chief's size, you need to target its massive arms (the hands can be locked onto). The strategy here is to just keep dodging round to its side and attacking, using your largest Charged Heavy Attacks whenever you've built up enough Focus Points. You can use spells to quicken the fight if you like - Immobilize works great, as does Cloud Step.
7. Cloudy Mist and Misty Cloud
 Image credit: Rock Paper Shotgun/Game Science
Another double-boss is coming up next. It's unmissable - just stay on the main path after the "Valley Entrance" Shrine instead of turning off into the lava, and the moment you pass through the second large archway, you'll trigger a cutscene which begins the fight against Cloudy Mist and Misty Cloud.
Mechanically, there's very little difference between this fight and the previous duo fight against Fast As Wind and Quick As Fire. One will stay back and attack you at range, while the other will charge you with flame attacks. The only wrinkle this time is that you can't just burst one down first - deal enough damage to one and they'll hide for a while, forcing you to contend with the other. Still, you should get to this point as quickly as possible by focusing one, because these guys aren't much of a threat on their own.
8. Keeper Of Flaming Mountains / Yin-Yang Fish
 Image credit: Rock Paper Shotgun/Game Science
The Keeper Of Flaming Mountains is the first Yaoguai King of Chapter 5, and the most challenging fight so far in the Chapter. You'll need to battle through Rakshasa Palace to reach the "Emerald Hall" Shrine where he can be found. It's still on the main path though, so you can't miss it.
This aesthetically wonderful boss fight is divided into two segments. In the first, you fight the Keeper Of Flaming Mountains, who isn't much of a threat on his own but who at regular intervals summons dark and light minions to attack you. Efficiency is key here. Wipe out the archers quickly, before they overwhelm you; then do the same with the melee attackers. The second time a summon occurs, it is Ma Tianba - the large horse-man you've no doubt encountered several times in your playthrough already. He's a tough one, with a very long range on his whip. He's a worthy target for Immobilize and your Transformation ability.
Once you've handled Ma Tianba, the Keeper Of Flaming Mountains will summon the Yin-Yang Fish, and the second phase will begin. Expect lots of projectile attacks and tail swipes - both of which you can dodge with a little practice. I recommend using Cloud Step in this phase of the fight, because you can use it to get close easily, and also to reliably dodge the Fish's most dangerous attack - where it floats into the air and sends off dozens of projectiles to track you. If one hits, they all hit, so carefully timed dodging is paramount here.
9. Crimson-Silver Cart
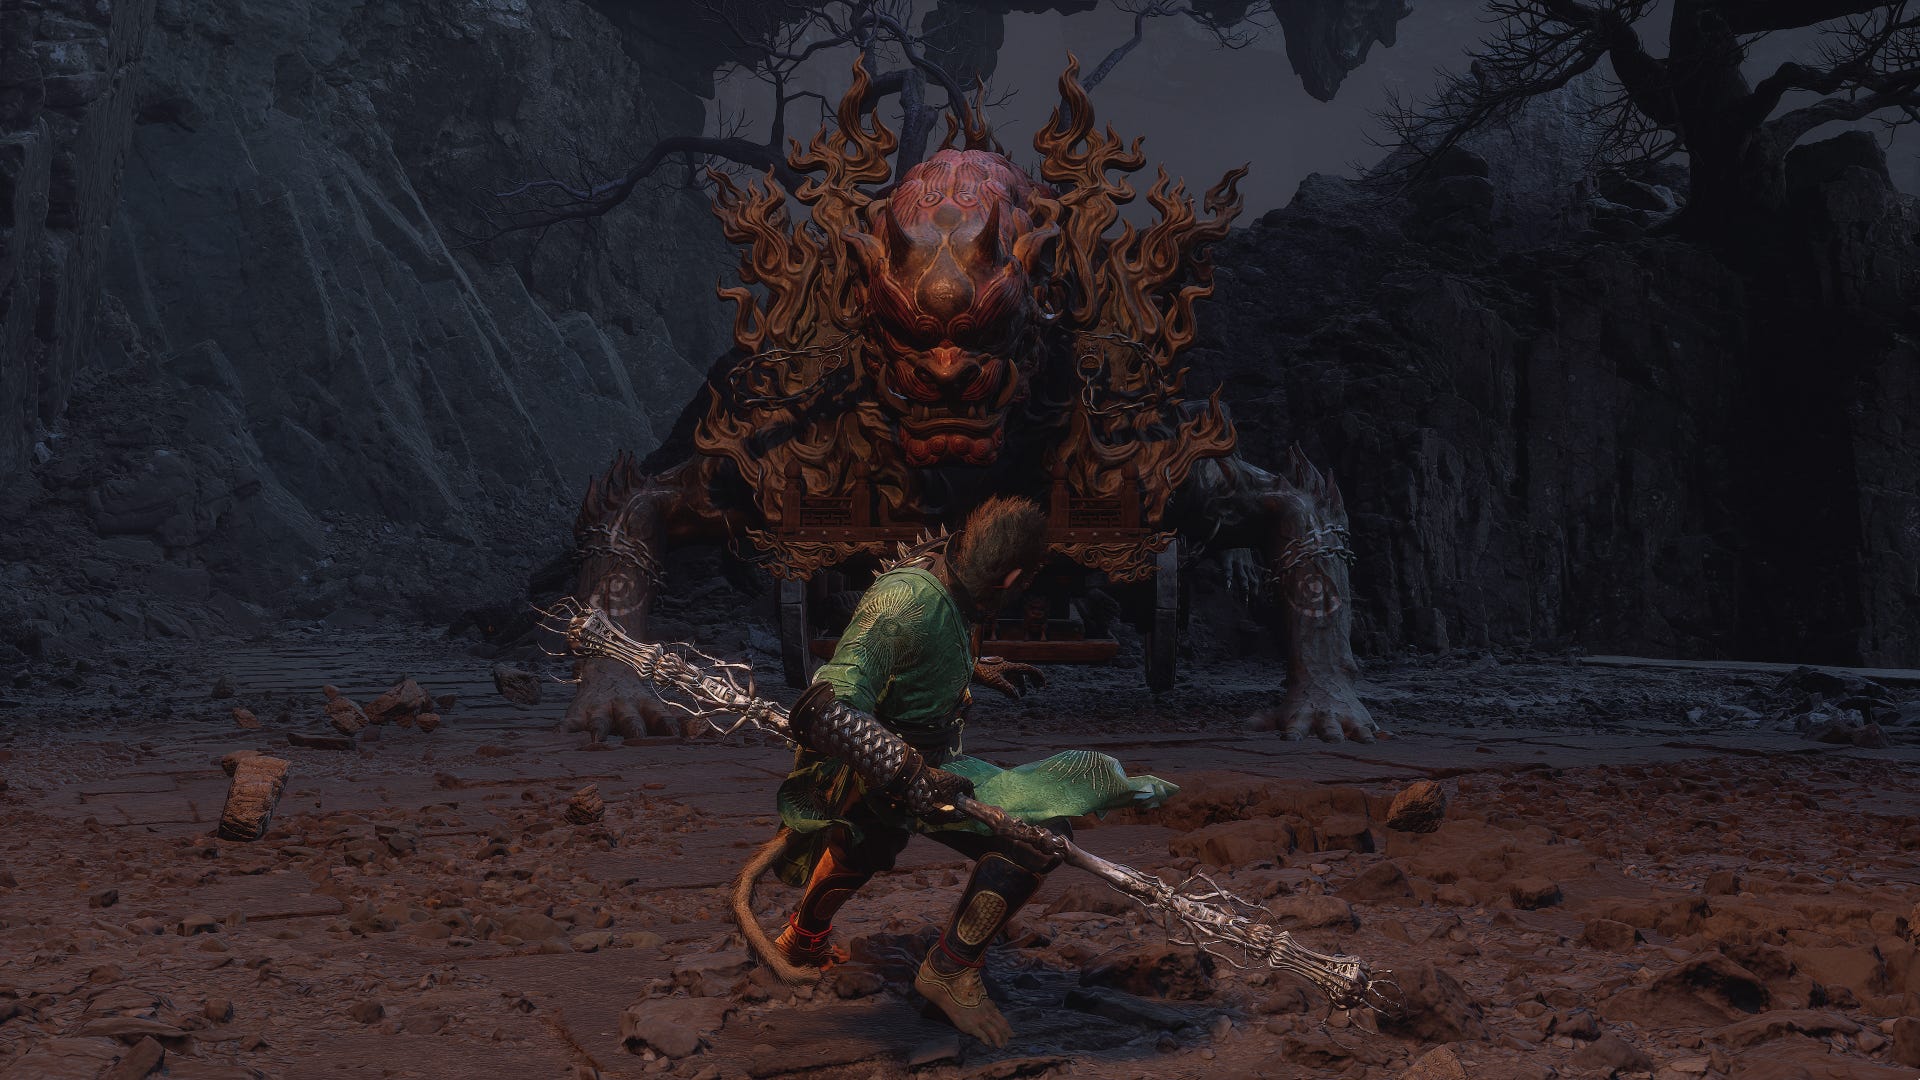 Image credit: Rock Paper Shotgun/Game Science
The location of the Crimson-Silver Cart is again slap bang on the story path, so you can't miss it. Take the left-hand path from the Keeper Of Flaming Mountains arena and after the next archway you'll be attacked from afar by the Crimson-Silver Cart up on the clifftop to your right. Follow the path up to reach it and defeat it.
This Cart is a bit more aggressive than previous Carts, so it may take you slightly by surprise. It can spout flames from its sides and back to counter flanks (this shouldn't stop you, but you should be prepared to dodge), and charge around if you try to break for a breather. Like the others, however, it really doesn't like being hit in the back with a big Charged Heavy Attack, so it shouldn't take too long to destroy.
10. Nine-Capped Lingzhi Guai
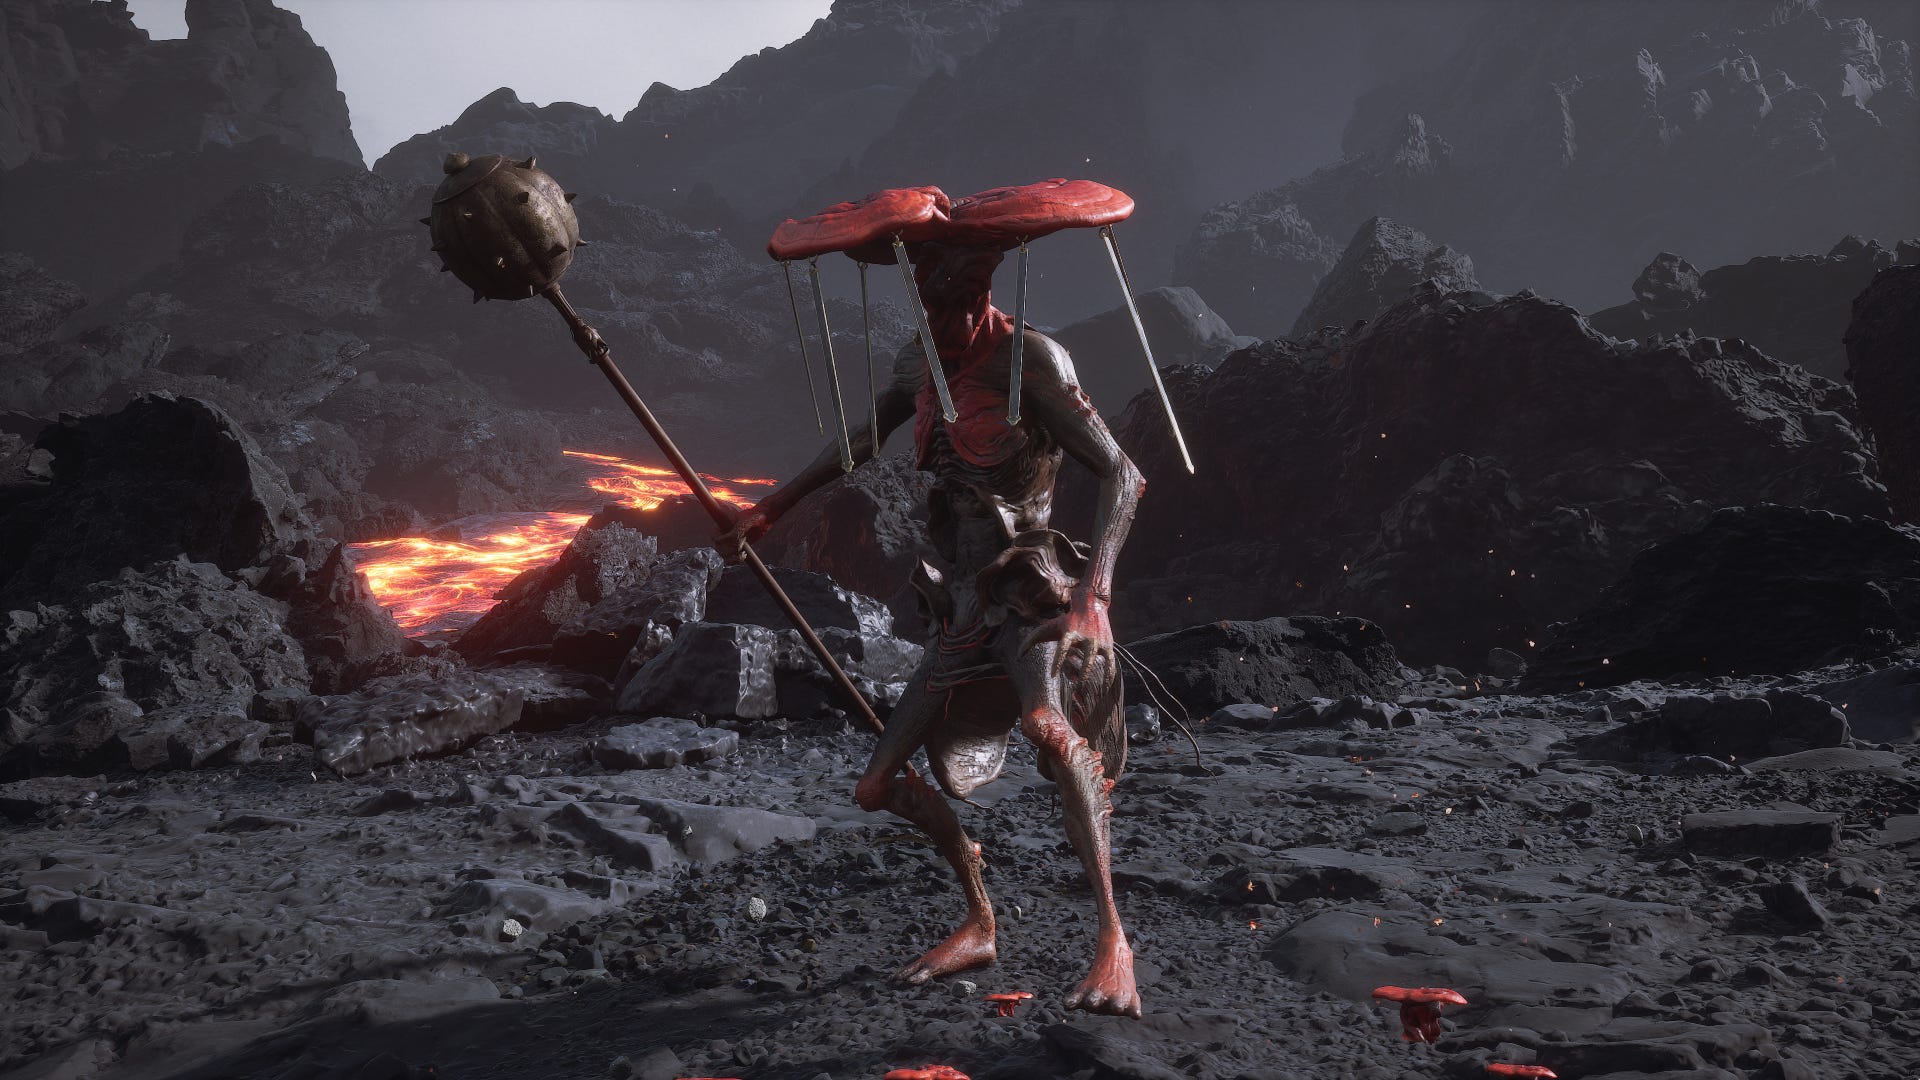 Image credit: Rock Paper Shotgun/Game Science
The Nine-Capped Lingzhi Guai is very easy to find if you know where to look. This boss is located in a small clearing just to the right of the "Ashen Pass III" Shrine; to get there, just follow the long linear path up the slope beyond the Crimson-Silver Cart boss. Once you're at the Shrine, turn right and pluck the largest, most central plant to spawn the Nine-Capped Lingzhi Guai.
The Nine-Capped Lingzhi Guai is much more of a troublemaker than it looks. It spews deadly poison at every opportunity, but more importantly, it can throw its hat (head?) at you, sticking it to your head and dramatically slowing your movement and dodge speed while also poisoning you over time. It's a move that can quickly result in your death, so if it happens to you, look for ways to counter the process - such as Transforming, or using Cloud Step. In general, you should use Spells heavily in this fight, because when given room to breathe, the Nine-Capped Linzhi Guai can be a bit of a terror.
11. Flint Vanguard
 Image credit: Rock Paper Shotgun/Game Science
The Flint Vanguard is located in the "Ashen Pass III" section, but you first need to reach the end of this section and the next Shrine ("Fallen Furnace Crater") before doubling back to find the Flint Vanguard. This is because of the big fuck-off spiked boulder that rolls back and forth along the main path, preventing you from doing pretty much anything until you (very carefully) get to the end and prompt a cutscene which ends the spiked boulder's reign of terror on the mountain slope.
Once you've reached the "Fallen Furnace Crater" Shrine, turn back around and go down the path you just came from. Keep following the path until it clearly splits into two, then take the left path. A short way along the path you'll encounter a cluster of rocks which - just like the Flint Chief - form themselves into the Flint Vanguard as you approach.
The Flint Vanguard itself is really no different from the Flint Chief, and therefore would be quite easy - if it weren't for all the extremely annoying minions clustered around him. These guys are hard to stagger, and so they can overwhelm you very quickly unless you're careful. Use A Flock Of Many to split their attention, then take care of the minions as quickly as possible before focusing on the big one.
12. Mother Of Flamlings (secret boss)
 Image credit: Rock Paper Shotgun/Game Science
The Mother Of Flamlings is a semi-hidden boss that you must actively summon at a particular location. That location is just a short way past where the Flint Vanguard is located. Head past the Flint Vanguard and you'll start to see little Flamlings crop up from the ground. Kill these Flamlings as they appear; some of them will give you Flame Ore. Once you have 4x Flame Ore, head to the clearing beyond, where you'll see a patch of ground that's smoldering with red flame beneath the surface. Interact with the patch of ground to deliver the 4x Flame Ore, spawning the Mother of Flamlings.
Again, the main issue with this fight is that you probably just used a load of your mana on the Flint Vanguard beforehand. But otherwise, it's a straightforward fight that involves lots of dodging flaming bullets, and also quickly killing smaller Flamlings as they arrive.
13. Rusty-Gold Cart (secret boss)
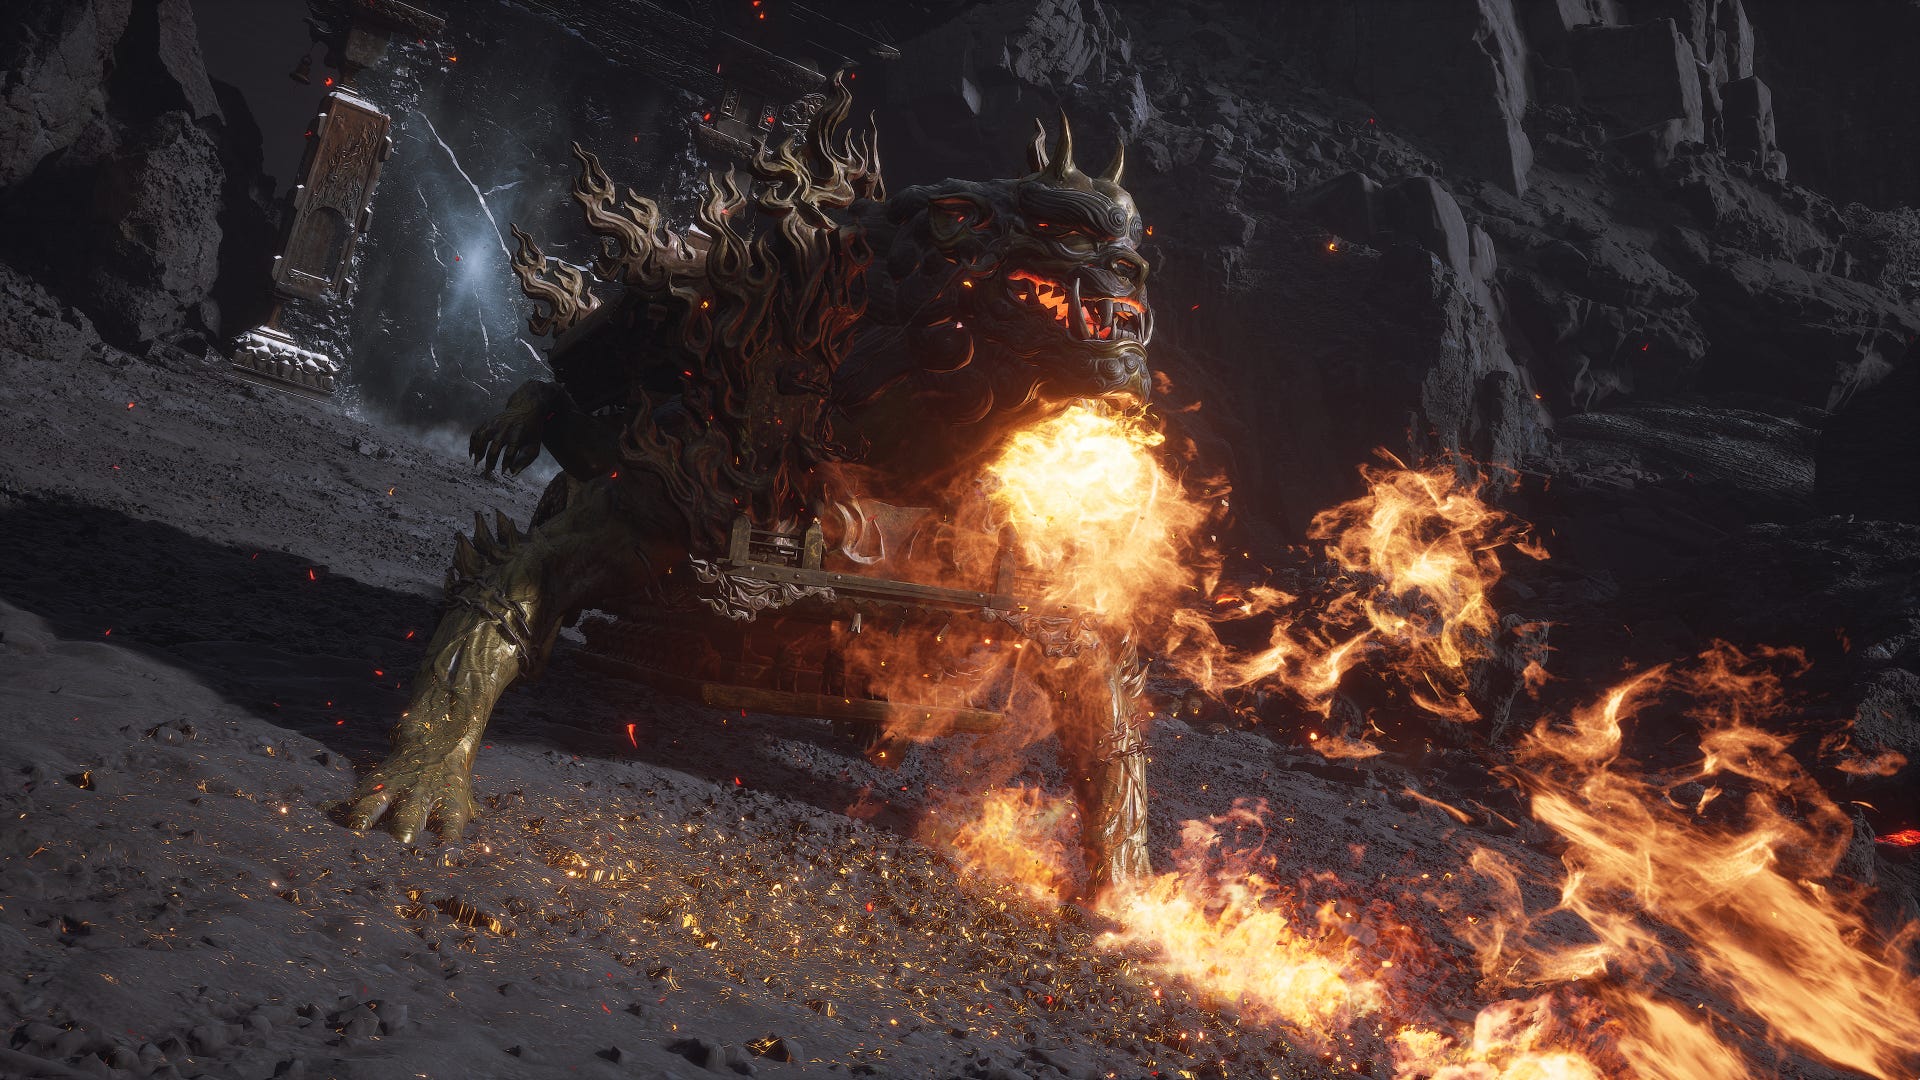 Image credit: Rock Paper Shotgun/Game Science
The final Cart of Chapter 5 is the Rusty-Gold Cart. It's found guarding the iced over archway near the "Cooling Slope" Shrine, which you can reach by following the path beyond the Mother Of Flamlings arena. However, the Rusty-Gold Cart will only spawn if you've followed certain specific steps in order. Here's what to do to spawn the Rusty-Gold Cart:
- Defeat and speak to the Pale-Axe Stalwart.
- Defeat the Brown-Iron Cart.
- Defeat the Gray-Bronze Cart.
- Speak to Ma Tianba inside the broken down Cart in the lava past the "Valley Entrance" Shrine.
- Defeat the Crimson-Silver Cart.
- Speak to the Pale-Axe Stalwart again at "Ashen Pass I".
- Speak to the Pale-Axe Stalwart again where you fought the Crimson-Silver Cart.
- Approach the iced over archway near the "Cooling Slope" Shrine to spawn the Rusty-Gold Cart.
If you complete all of these steps, then as you approach, a cutscene will trigger, showing the Rusty-Gold Cart having just wiped the floor with the Pale-Axe Stalwart. This is the toughest Cart of all, with a lot of mobility and health to whittle away at over time. A Flock Of Many, Immobilize, and Charged Heavy Attacks are still your best bet here. Don't expect the Rusty-Gold Cart to stagger; just keep circling round to its back and preparing to dodge its flame gouts.
As a reward for defeating the Rusty-Gold Cart, you get the Flame Orb Curio, and you can also speak to the (now-dying) Pale-Axe Stalwart, after which you can finally open Chapter 5's secret area: Bishui Cave. Just go up to the iced over archway and interact with it to reveal the secret area, which contains three more bosses to face. Better rest up first!
14. Baw-Lang-Lang (secret boss)
 Image credit: Rock Paper Shotgun/Game Science
Baw-Lang-Lang is another oversized frog guai skulking off to the left-hand side, just beyond the Rusty-Gold Cart's icy archway once you open it up. It's in darkness, so it's easy to miss, but it's right there inside the cave, waiting for you.
As for defeating it, that shouldn't be too difficult. This one deals Scorch damage and has a flaming tongue, which means you should probably stock up on Scorch resistance (as you should have been doing throughout Chapter 5, really), but otherwise it's the same fight as before. Beware the backwards kicks and the tongue attack, but otherwise you won't have much of an issue here.
15. Top Takes Bottom and Bottom Takes Top (secret boss)
 Image credit: Rock Paper Shotgun/Game Science
Once you've opened up the iced over archway, approach the large pillar in the cave to trigger an Obsession which transports you into Bishui Cave. A short way down the path beyond the "Purge Pit" Shrine, you'll be set upon by yet another boss duo: Top Takes Bottom, and Bottom Takes Top.
This fight is another step up in challenge from the previous duo fight; rather than disappearing when one of them reaches low health, they instead hide inside their hemisphere and become invulnerable, forcing you to attack the other boss. This is worse than disappearing, because they'll occasionally reappear and attack you before hiding again. Mercifully, however, their attacks are simplistic and heavily telegraphed, so you can easily dance around them and whittle down their health pools.
16. Bishui Golden-Eyed Beast (secret boss)
 Image credit: Rock Paper Shotgun/Game Science
The Bishui Golden-Eyed Beast is the main boss of Bishui Cave, and the second-hardest boss of Chapter 5, thanks mainly to its incredible aggression. It's impossible to miss as long as you keep delving deeper into Bishui Cave. An ice slide will get you to the "Corridor Of Fire And Ice" Shrine, and just beyond that is the Bishui Golden-Eyed Beast arena.
First off - watch out for an immediate attack the first time you see him. As his name comes up, he's literally pouncing towards you, so get ready to dodge, fast. After that, prepare to use all your Spells (and likely some consumables too) to make this fight easier. The Bishui Golden-Eyed Beast will set the entire arena aflame over the course of the fight, so make sure your Scorch Resistance is as high as possible. A Flock Of Many is not a great choice here due to the flames; save your Mana for Transformations and either Cloud Step or Rock Solid.
17. Red Boy
 Image credit: Rock Paper Shotgun/Game Science
Now, it's back to the "Fallen Furnace Crater" Shrine for the final fights of Chapter 5. Approach the Bull King just a short distance beyond the Shrine, and a cutscene will trigger, during which it transpires that Pingping the fox was actually the Bull King's son, the Red Boy, all along.
The themes of this fight are range and flame. The Red Boy makes a habit of sending forth various kinds of ranged attacks at you rather than attacking you in melee, using shockwaves, summons, or just letting his double-bladed spear fly around by itself and attack you. When he does engage in melee, it's usually with fast dash attacks that can be hard to see coming.
Fortunately, the Red Boy doesn't have a huge health pool, and he is susceptible to your Spells - particularly Immobilize. He's also easily staggered, which makes Transformations like the Yin Tiger's Ebon Flow very effective at keeping him under control. Sadly, your trials are not over once you defeat the Red Boy, for he shortly thereafter transforms into the much more powerful Yaksha King.
18. Yaksha King
 Image credit: Rock Paper Shotgun/Game Science
The Yaksha King is the final boss of Chapter 5, and the most powerful enemy of the entire Chapter by quite a long way. I'm labelling him as a separate boss from the Red Boy because, mercifully, if you die while facing the Yaksha King, you don't have to go through the Red Boy phase again. You can just respawn at the "Fallen Furnace Crater" Shrine and fight the Yaksha King immediately.
The good news is that Zhu Bajie is there to help you for the first part of the fight. The bad news is, the Yaksha King is really fucking strong. I advise practicing a fair bit without consumables until you're more confident, and then using several of your best potions to give yourself a better chance of victory. Rock Solid is a lifesaver in this fight - as is the Golden Lining Transformation, which allows you to easily parry a good chunk of the Yaksha King's attacks.
The most dangerous attack you need to prepare for is when the Yaksha King grows two long strands of flame and starts twirling them around in a succession of very long-reaching and extremely damaging attacks. The timing is very awkward for this combo, so if you're having trouble, I recommend using your Transformation at this point and staying in melee range so you can deal damage and soak up attacks without depleting your real health bar. The Yaksha King's area-of-effect attacks will also annihilate your duplicates, so don't bother with A Flock Of Many - you need that Mana for your Rock Solid deflects and Immobilizes. Keep at it, it's tough but doable!
That concludes our Chapter 5 boss locations guide! Be sure to check out our guide on the best skills in Black Myth Wukong if you're struggling. Alternatively, feel free to peruse our guides on any quests you may have missed, including the Chen Loong questline, the Drunken Boar quest, the Old Rattle-Drum quest, and the Man-In-Stone quest.


